
Fans of makeup, are you prepared to perfect the skill of flawless application? Everyone has heard of Beauty Blenders—those mystical sponges that seem to be the secret to flawless airbrushing. But, What Beauty Blender to use?
However, with so many alternatives available, it’s time to solve the riddle of “What Beauty Blender to Use.”
In order to assist you in making an informed decision, we’re today going deeply into the realm of cosmetics sponges.
The Revolution of the Beauty Blender
Let’s investigate the fascinating history of these cosmetic wonders before moving on to the What Beauty Blender to use? Beauty sponges, which were once adored by makeup artists, saw a decline in appeal as brushes gained prominence.
What is Beautyblender?
The Beautyblender is a flexible tool for applying and blending cream or liquid makeup thanks to its “exclusive aqua-activated foam” and distinctive spherical form. What makes it famous? A spotless, faultless appearance.
When applying foundation, concealer, BB creams, serums, or moisturizers, use the Beautyblender sponge. It is exceptional at giving off a polished appearance without the clumsy, tacky feel of fingertips.
Pro tip: The beauty blender may be used wet or dry, but the pros advise using dry for the first layer and wet for a more natural-looking blend.
What Beauty Blender to use
Let’s investigate other alternatives to the cosmetic sponge now that we are familiar with the beauty blender.

- Wedge-shaped Beauty Blender
Think of a way to improve upon the beauty blender’s popularity. The wedge-shaped makeup sponge comes into play at this point. The functions of these sponges are identical to those of the beauty blender, but their appearance is different. They are ideal for getting to every facial contour because of their flat edges and bottoms.
When to Use a Sponge with a Wedge Shape?
Use the pointed edges to precisely contour the face, especially the area around the nose. Wedge sponges shine in confined areas like the brow bone and the area under the eyes.
Pro Tip: To get a sheerer effect while applying foundation all over using a wedge makeup sponge, add a little water. It’s a practical tip that guarantees effective makeup application.
2. Puffy Beauty Blender
The Pretty Puff was created at Pretty Lane because there are no limits to inventiveness. In order to achieve an airbrushed effect, this hybrid makeup sponge combines the rounded teardrop form of the beauty blender with a flat edge for pressing and patting makeup into your skin.
When to Use the Puffy Beauty Blender?
This multipurpose sponge is ideal for contouring and all-over application, reaching into those difficult-to-reach places behind your nose and under your eyes.
Pro tip: To prolong the life of your Pretty Puff and preserve hygiene, clean it frequently. For efficient cleaning, use dish soap, alcohol spritz, or brush cleaner.
3. Silicone Makeup Sponge
the silicone makeup sponge, the new kid on the block. It’s a whole different beast with its flat, rounded shape. It doesn’t absorb a drop of your priceless cosmetics, in contrast to conventional sponges.
When to Use a Silicone Sponge?
Use this sponge for applying liquid or cream makeup. When it comes to powders, it’s not your ally.
Pro Tip: For a smooth finish, apply foundation using a silicone sponge in a “pushing motion” and then blend with a porous sponge.
4. Makeup sponge made of microfiber
Think about how silky velvet might feel against your skin. You should use that microfiber makeup sponge. It’s a flexible choice that works with both liquid and powder foundations.
Some cosmetic fans even use it in place of brushes, particularly when applying setting powder.
When to Use a Microfiber Sponge?
This densely fibered sponge excels in applying powder with a concentrated, even coat. To apply blush, bronzer, or any other powder in your makeup routine, it can also be your go-to tool.
Pro tip: For a flawless finish, use the microfiber sponge to fix your concealer under your eyes with powder.
Making Use of Your Beauty Blender to Master the Art of Makeup
Without question, the makeup industry has been transformed by the Beautyblender. Just take a look at this astounding figure. Since its debut, the hashtag #beautyblender has been used over a million times. We can’t image our cosmetic routines without this game-changer.
If you’re anything like us, your Beautyblender has evolved into a dependable friend and an essential component of your daily beauty routine. But hold on, this tiny sponge is more complex than it first appears.
Beyond its endearing outward manifestation, it conceals a wealth of best practices, pointers, and techniques that can take your makeup application to a whole new level. Let’s explore everything you need to know to utilize your Beautyblender to its fullest ability.
How to Use Beauty Blender
The Beautyblender is a multipurpose makeup tool that can work with nearly everything in your beauty kit, including foundation, BB creams, and concealers. It is not your typical sponge.
But you must perform these three steps—wet, squeeze, and bounce—to fully reveal its brilliance.

- Wet Beauty Blender
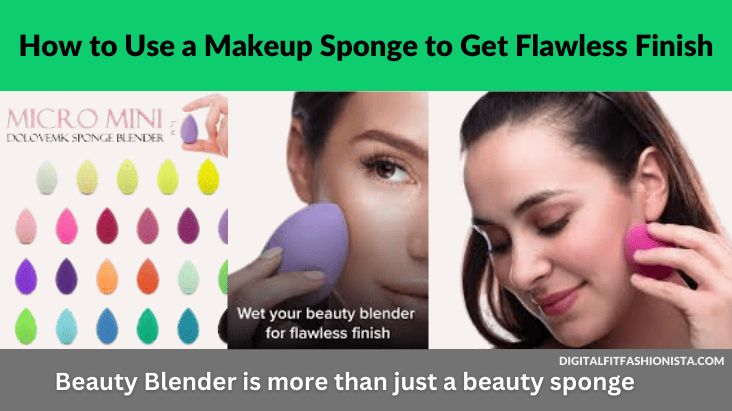
The Beautyblender is designed to be utilized when wet. So, moisten your Beautyblender. Run it under the tap until it is completely saturated before using. You’ll see that it grows, almost doubling in size.
It’s wholly intended, so don’t be alarmed. The blender’s distinctive aqua-activated foam composition absorbs the water, not your priceless cosmetics. This makes sure that more product stays on your skin and doesn’t end up on the sponge.
2. Squeeze it Out
After your Beautyblender has become completely saturated, gently squeeze it to get rid of any extra water. The idea is to use a moist blender to apply makeup, therefore it’s essential to squeeze out the extra water.
Now that it is the right size and moisture level for dipping into your product, your Beautyblender should be there. You can be confident that no product will be wasted because it will just bounce off the sponge’s surface rather than being absorbed.
3. The Bounce
Use your Beautyblender to lightly buff on your concealer, BB cream, powder, or liquid foundation by bouncing it around your skin. Don’t run the blender across your face. The product can be poorly distributed by swiping, leading to streaks and lines.
The motion of bouncing guarantees even, continuous covering. Use the wider end for larger surfaces like your cheeks, chin, and forehead, and the pointed tip to get under your eyes and around your nose.
How to clean your Beauty Blender
Maintaining the health of your skin by keeping your makeup sponge clean also extends the sponge’s lifespan. It’s best to wash your Beautyblender after each usage to avoid the accumulation of dirt and grime.
- The Liquid Blendercleanser solution from the Beautyblender brand is a very effective yet gentle mix appropriate for both your blender and regular makeup brushes. Simply spritz the mixture into your blender and work up a light lather.
Combining it with the Clean tools will make it easier to use by giving you a stable surface to clean.
- The Instaclean spray is a lifesaver if you’re pressed for time and on the go. No rinsing is necessary; just a few spritzes immediately onto your blender and a quick wipe with a towel will do.
- Like your toothbrush and mascara, it’s advised to replace your Beautyblender makeup sponge every three to six months for maximum cleanliness and hygiene.
How to Use a Makeup Sponge to Get Flawless Finish
It’s time to maximize the capabilities of your Beautyblender now that you’ve mastered the fundamentals. Although this multipurpose sponge works great for applying foundation and concealer, it is capable of much more. Let’s look at some of its many applications.
- Flawless Finish
You should always use The Original Beautyblender to get a flawless foundation finish. With practically any product, whether liquid or powder, it functions without a hitch. For long-lasting coverage, you can also use it to lightly bounce on setting powder.
2. The Blusher
The Blusher is fantastic for blending out cream blush and highlighter to give your skin a healthy glow because it is somewhat smaller and properly proportioned for the apples of your cheeks.
3. The Micro mini Blender
The Micro Mini, the smallest member of the Beautyblender series, is your precision instrument. Use it to apply eyeshadow or to get to those hard-to-reach areas, like the inner corners of your eyes. This multitasker is one you didn’t know you needed.
4. Beautyblender is more than just a beauty sponge
It’s the secret to consistently obtaining the desired perfect finish. Make the most of this revolutionary beauty tool by moistening, squeezing, and bouncing.
Conclusion: What Beauty Blender to use
With the help of this thorough guide, you’re now prepared to choose the ideal makeup item. Whether you choose the poreless perfection of the Beautyblender, the accuracy of a wedge-shaped sponge, the adaptability of the Pretty Puff, the effectiveness of a silicone sponge, or the luxury of microfiber, you’ll be satisfied with the results. So go ahead, try other ones, and pick the one that best meets your requirements. You’ll never play cosmetics the same way again!
FAQs: What Beauty Blender to use
Does it matter which beauty blender you use?
Yes, picking the proper beauty blender is important. It’s similar to picking the ideal paintbrush for an artist. The finish and precision of your makeup are impacted by the texture, shape, and material, making it a crucial decision in your beauty routine. Therefore, don’t undervalue the power of the ideal tool for perfect results.
How to use beauty blender for concealer
Apply a small bit of concealer where it is needed. For a flawless, natural finish, gently bounce and mix with the damp beauty blender, working inward from the edges. To keep your beauty blender hygienic and effective, clean it frequently.

- What are the 7 steps of the Miracle Morning? - May 30, 2026
- Is it possible to reverse skin ageing? - August 21, 2025
- How to regain motivation during burnout? - August 12, 2025


